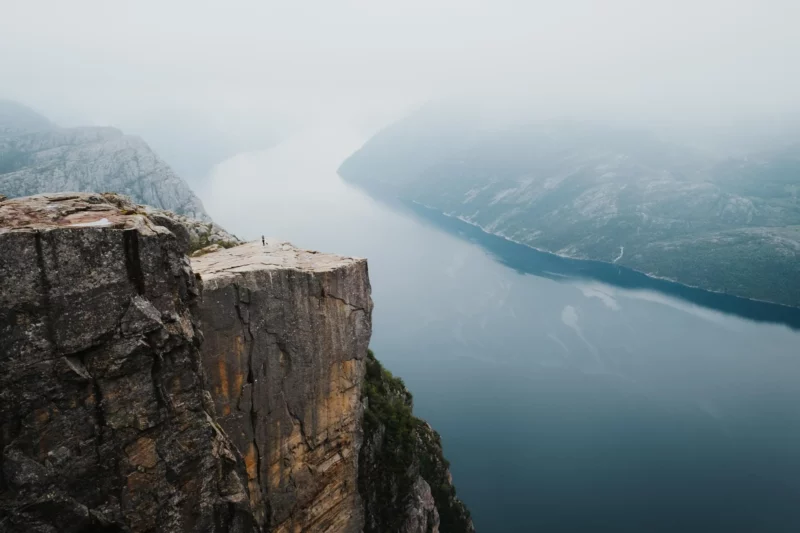
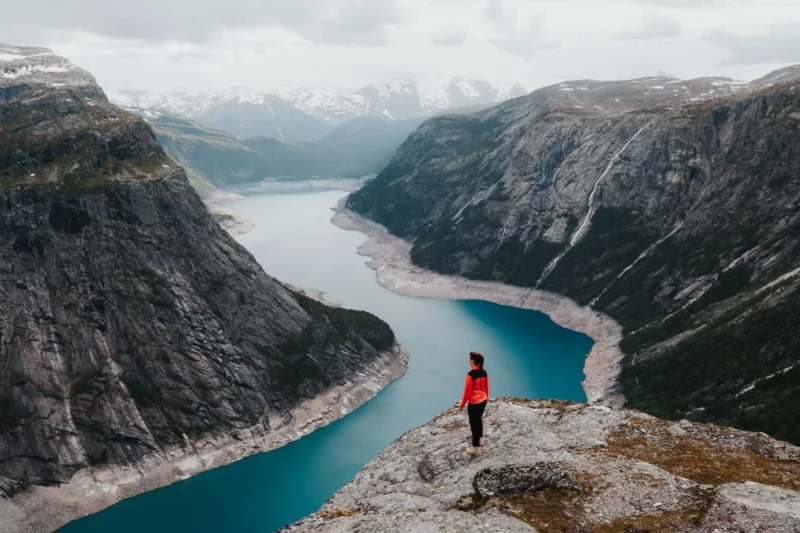
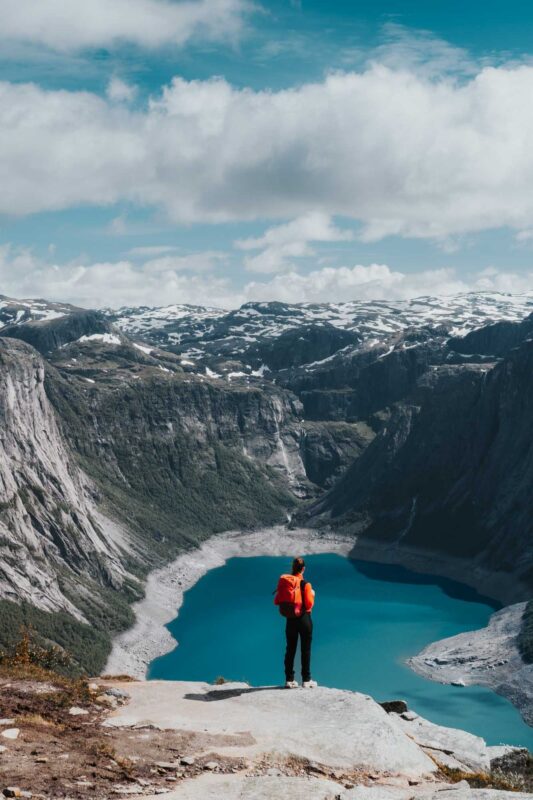
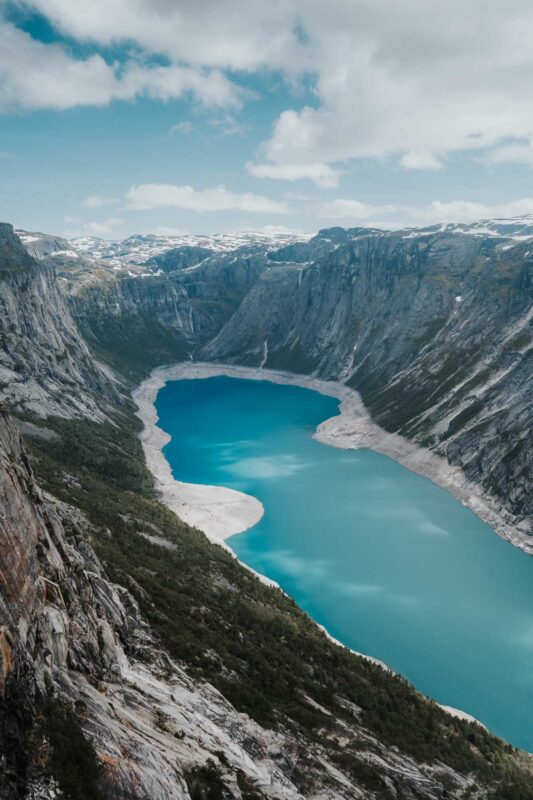
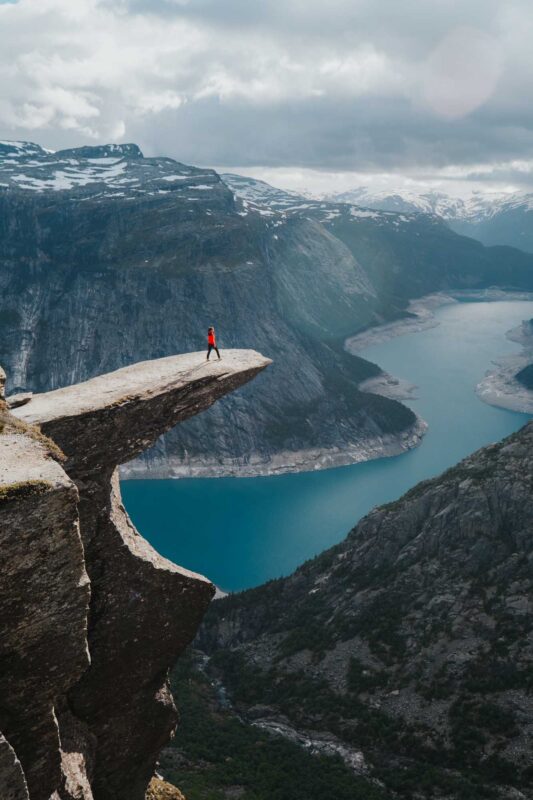
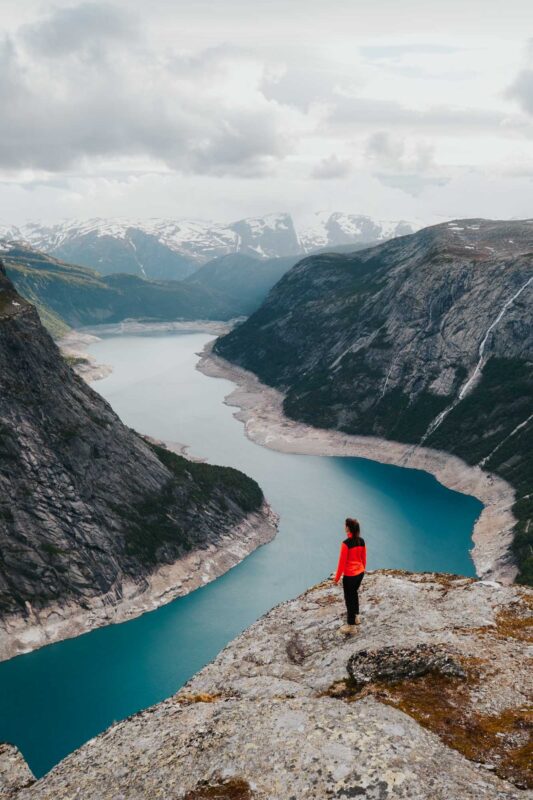
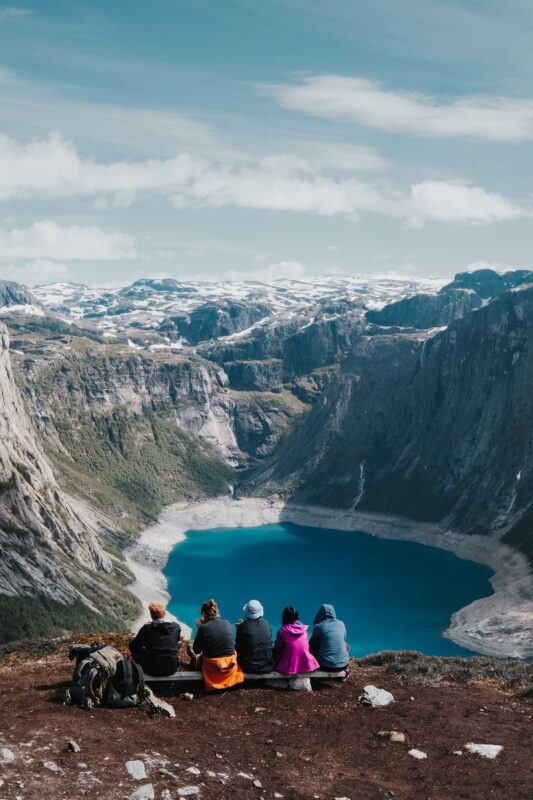
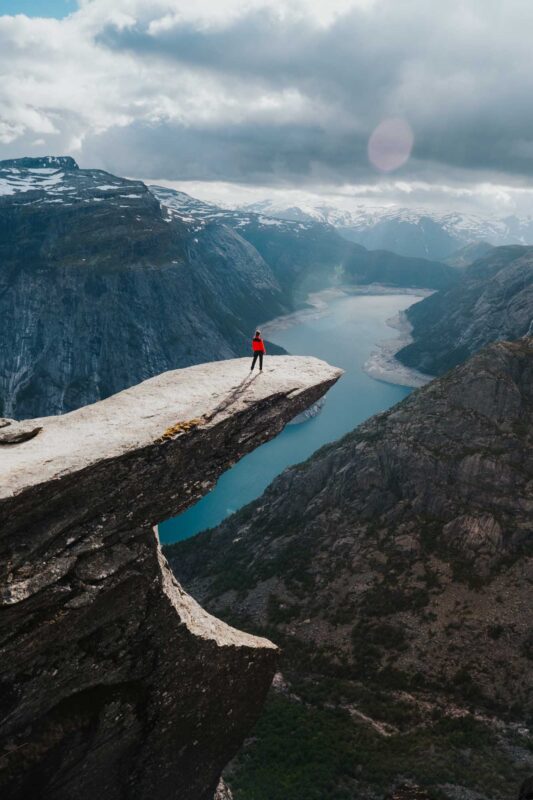
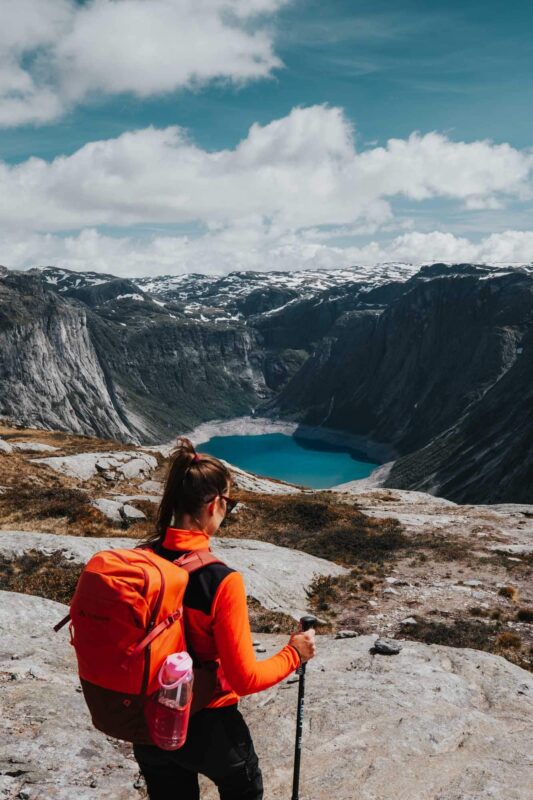
Trolltunga is one of Norway’s most spectacular viewpoints. This overhanging rock, resembling a troll’s tongue, hovers 700 meters (2,300 ft) above the stunning Ringedalsvatnet lake. From here, you can gaze out over picturesque mountain peaks and capture breathtaking photos. To reach Trolltunga, you’ll need to undertake a challenging hike through the mountains. Proper preparation is key, so this article provides everything you need to know about hiking to Trolltunga. We cover the different ways to approach the hike, describe what the trail is like, and share essential practical tips to help you make the most of your Trolltunga adventure!


Trolltunga Hike at a Glance
Distance: 20 km (12.4 mi) total
Duration: 7 to 10 hours hiking (can be split into two days)
Elevation Gain: 640 m (2,100 ft)
Difficulty Level: Moderate to challenging
These figures are based on starting from P3 Mågelitopp. Depending on where you park, the hike may be longer. More details on this later.

Is the Hike to Trolltunga Suitable for Everyone?
The hike to Trolltunga is 20 kilometers (12.4 mi) long with 640 meters (2,100 ft) of elevation gain. This makes it a fairly strenuous trek, but it is manageable for most people with a good basic fitness level. The trail does not require much technical skill and is very well-maintained. Additionally, it is possible to split the hike into two days, which makes it more accessible. The key is to bring the right gear to ensure a comfortable and safe hike. Weather conditions in the mountains can change rapidly, so proper preparation is crucial. Further down, we provide a comprehensive packing list for the Trolltunga hike.


The 4 Different Ways to Visit Trolltunga
There are four different ways to undertake the hike to Trolltunga. Below, we outline each option and explain the differences.
Option 1: Self-Guided Standard Hike in One Day
Between June 1 and September 30, you can undertake the hike independently, completing the round trip in one day. From October to May, it is only possible to hike with a guide due to more challenging conditions.
Completing the hike in one day is quite demanding but remains the most popular choice. Many people underestimate the intensity of the trail’s length. You will cover 640 meters (2,100 ft) of elevation gain and spend 7 to 10 hours hiking, starting from the official point P3 Mågelitopp. Since most people choose this option and tend to start around the same time, it can get very crowded at peak hours on Trolltunga. We’ve been informed that in July and August, there can be a queue of up to an hour and a half to take a photo on the rock. We recommend either avoiding the one-day hike or starting very early in the morning. The following options might provide a better experience.


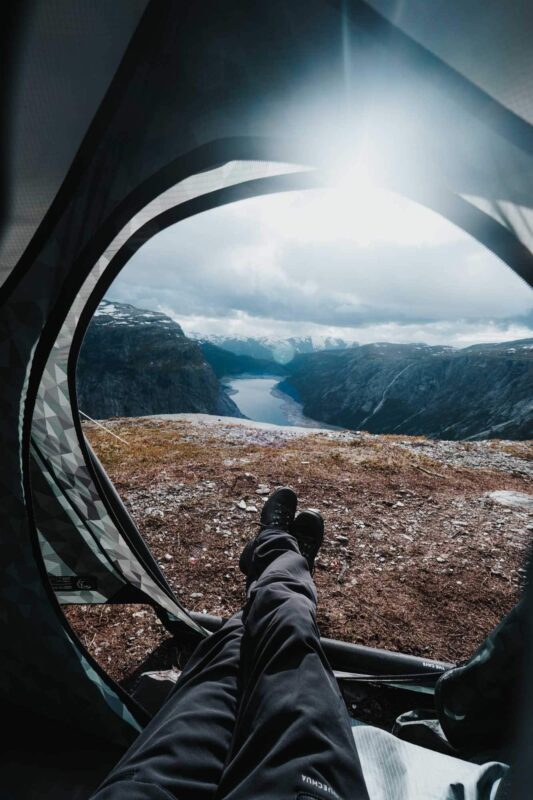
Option 2: Self-Guided Standard Hike + Camping
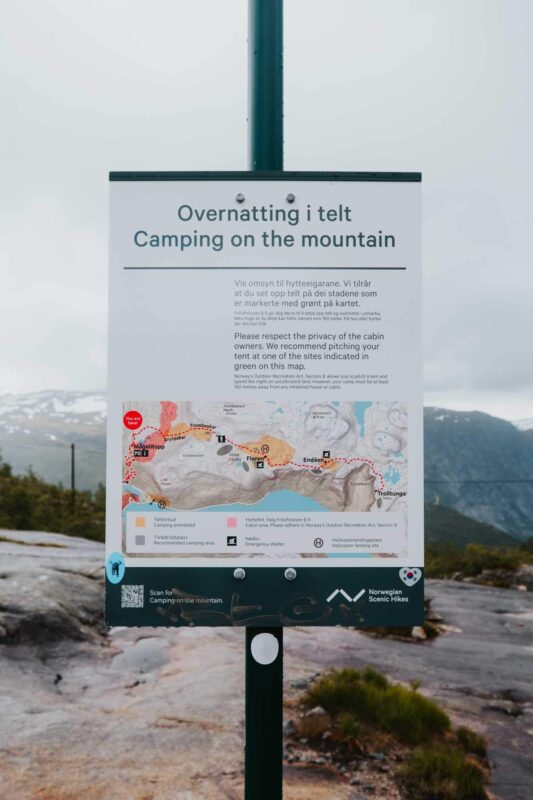
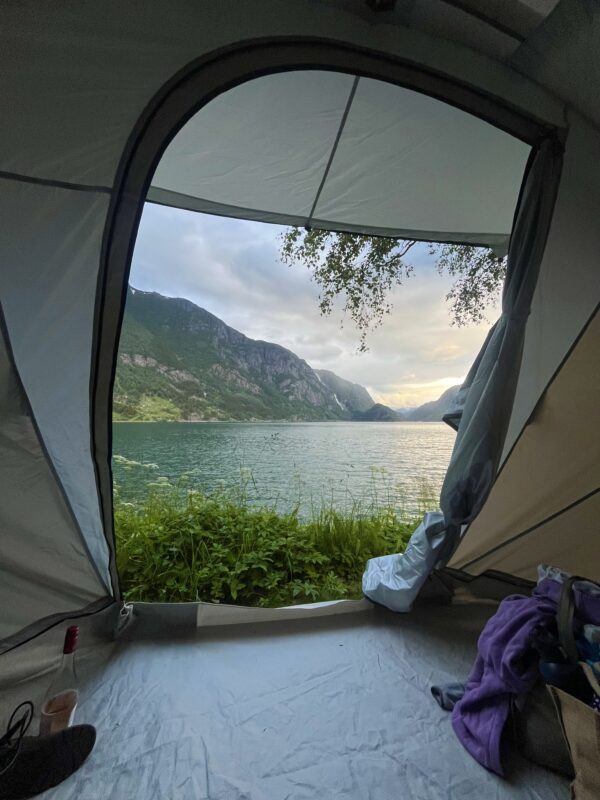
Camping near Trolltunga is allowed, so you can choose to camp with your tent independently. This is only recommended if you have experience with backcountry camping in the mountains and the right equipment. Weather conditions can change rapidly, leading to extreme conditions such as snowstorms and significant temperature fluctuations. Additionally, you’ll need to carry all your gear during the hike, including meals, tent, sleeping pad, and sleeping bag. While this saves money compared to organized tours, you’ll be at Trolltunga without the day-trippers.
Tip: Camping is allowed in many areas around Trolltunga, but not everywhere. Check this map to see where you are permitted to camp.


Option 3: Standard Hike + Organized Overnight Stay (Our Choice)
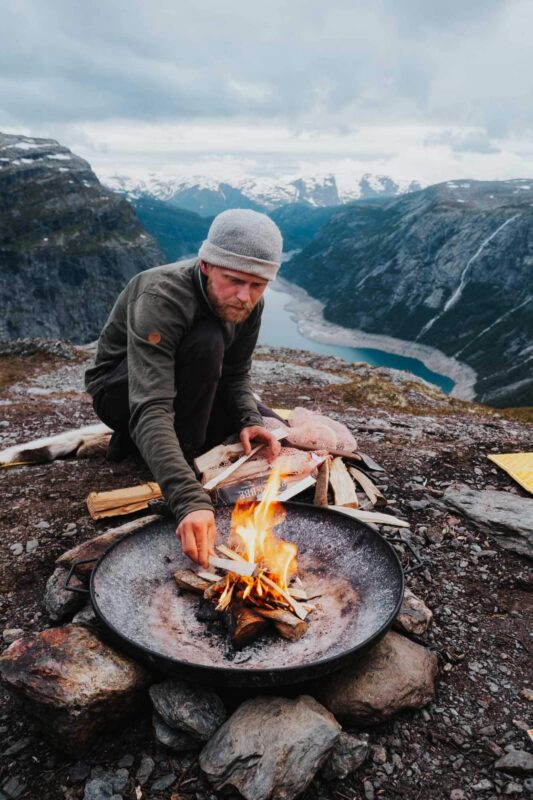
If you lack experience with mountain camping or prefer not to carry camping gear during the hike, consider an organized tour with an overnight stay at Trolltunga. You will follow the same route as others but start later in the hike and camp near Trolltunga. Two guides will accompany you, providing delicious meals, snacks, and drinks. Since you start in the early afternoon, you will arrive at Trolltunga around 5:00 PM, when the day-trippers have left, giving you ample time to enjoy the view and take photos. Afterward, you will walk a short distance to the camp, where you can enjoy a great view and a wonderful dinner. A campfire will be set up, and you’ll have hot chocolate with whipped cream and marshmallows. If you’re lucky, you might catch a beautiful sunset during the evening walk. The next morning, you’ll hike back the same route.
This is the option we chose and can highly recommend to everyone! The hike is very manageable, you have all the time you need, and you get a unique experience with the special overnight stay. The tour often gets fully booked months in advance, so be sure to book early if you want to go for this option. You can book the tour here.


Option 4: Via Ferrata Tour Up, Standard Hike Back (Optional with Organized Overnight Stay)
The most unique and varied way to reach Trolltunga is with the via ferrata tour. You can book this as a one-day tour or as a two-day tour with organized overnight stay. After a scenic walk along the mountain lake, you will climb a 250-meter (82 ft) steep rock face using a via ferrata. This is a route secured with steel cables along a steep rock face where you attach yourself to the cable. No technical skills are required, as it mainly involves climbing steps, but your fear of heights will certainly be challenged. An adrenaline kick is guaranteed when you tackle the sheer rock face!
When you arrive at Trolltunga, most people have already left, so you can enjoy the spectacular view in peace. Depending on whether you choose the one-day or two-day tour, you will either hike back via the standard route or to the tent camp. If you choose the two-day tour, you will spend the evening overlooking a fantastic landscape and enjoy a well-deserved dinner. Afterwards, you will spend the night in a unique dome tent. The next day, you will hike back to civilization via the standard hiking route.

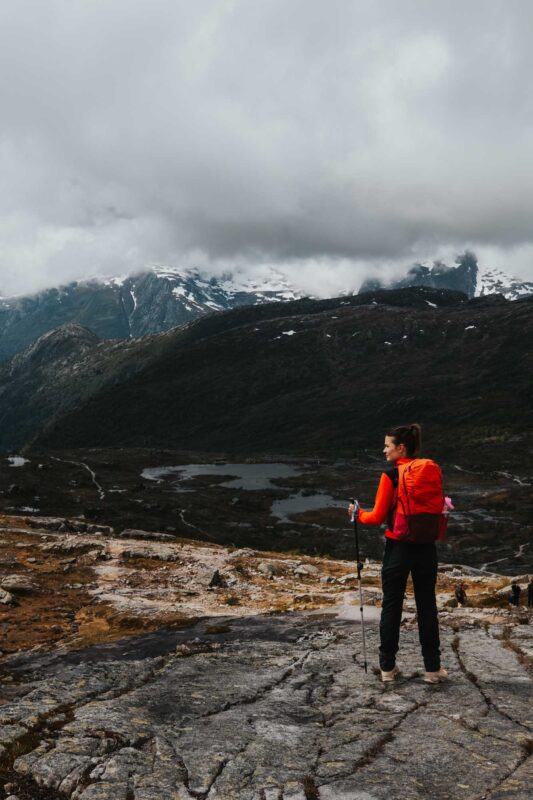
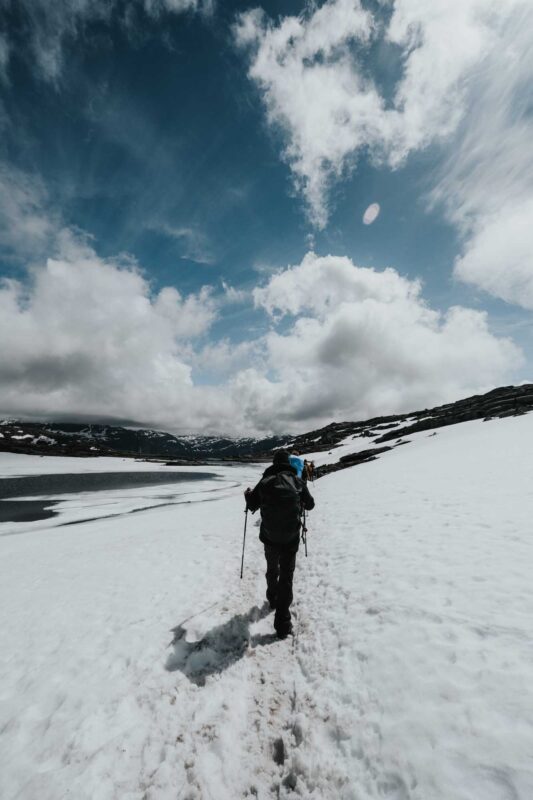
What is the Hike to Trolltunga Like?
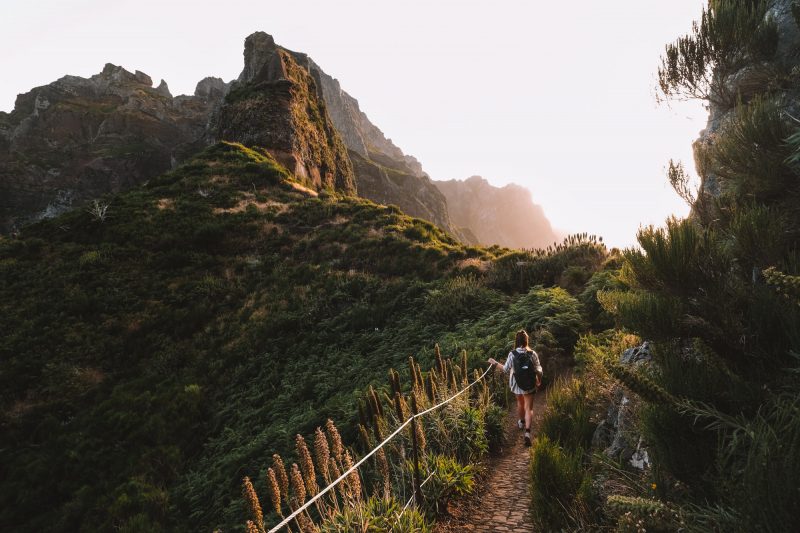
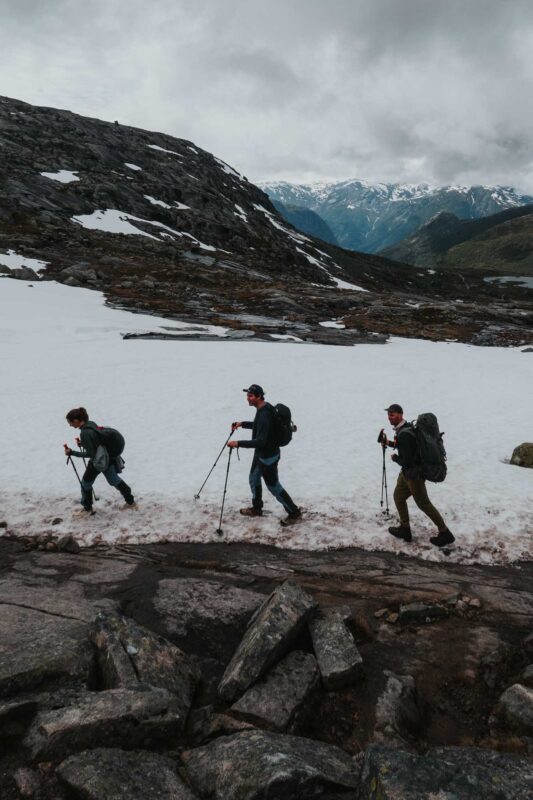
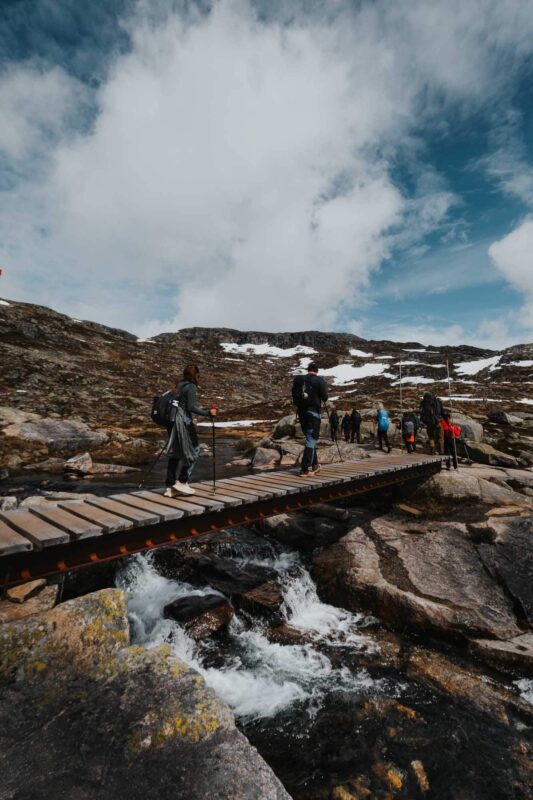
The first part of the hike to Trolltunga covers a flat landscape with some small bridges. Soon, you will encounter the first climb, which is the most challenging part of the hike, as you gain several hundred meters in elevation. Luckily, you will still have plenty of energy for this! This section of the route consists of a well-maintained path with large stones and rocks. This path was built by Nepalese sherpas, the most skilled in this field, which makes the climb much easier.
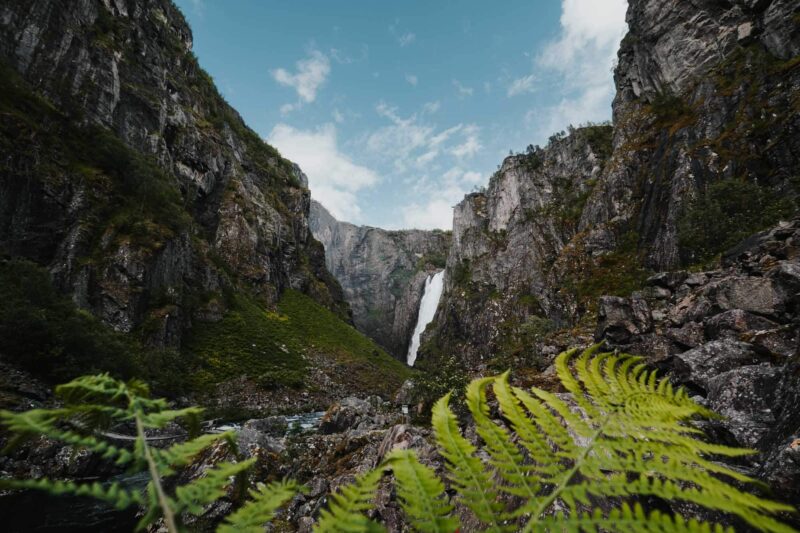
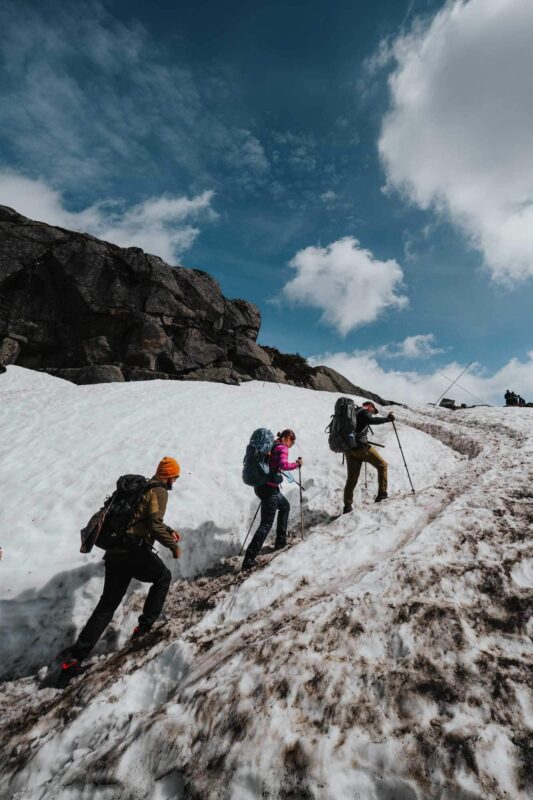
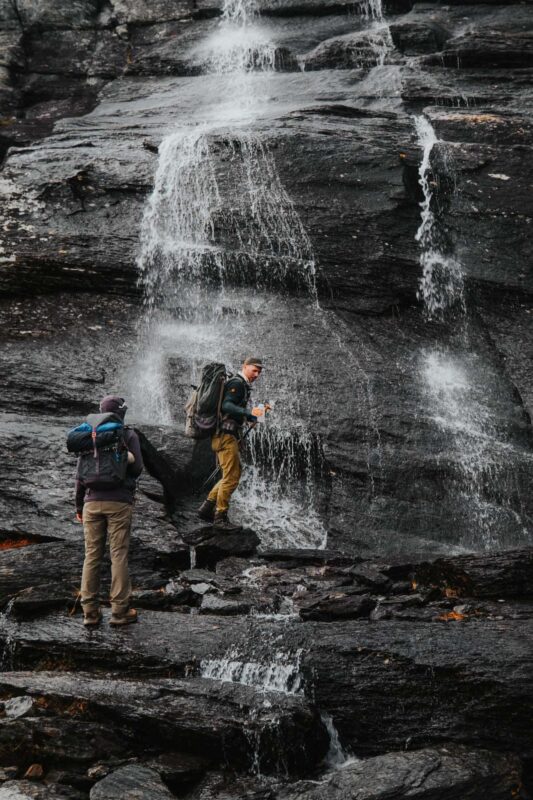
The subsequent kilometers have a flatter path with smaller hills. You will walk through beautiful landscapes with mountain lakes, rocks, and waterfalls. Occasionally, you will step through a small babbling stream. If you’re early in the season (May and June), you may still encounter snow on certain parts of the trail.


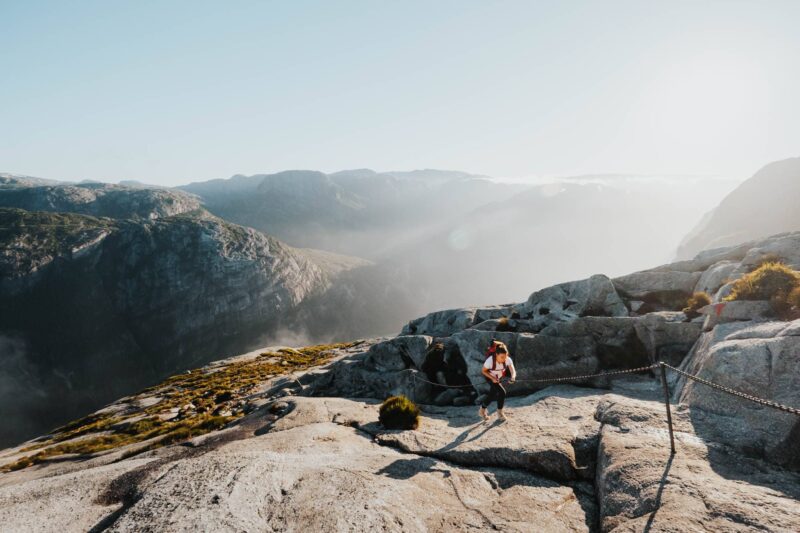
As you reach the final kilometers of the hike to Trolltunga, you will be treated to spectacular views. You will now have a view of Ringedalsvatnet lake and the surrounding mountains. The further you walk, the more beautiful the view becomes. The path is mostly flat here, so the final kilometers are not difficult.
Arriving at Trolltunga, the ‘troll’s tongue’ is even more impressive than in photos. The overhanging rock is quite large, and walking out on it is not too thrilling. It’s much more exciting to watch from a distance as someone else walks out. Always be cautious and stay away from the edge. To return, you will hike back along the same route.
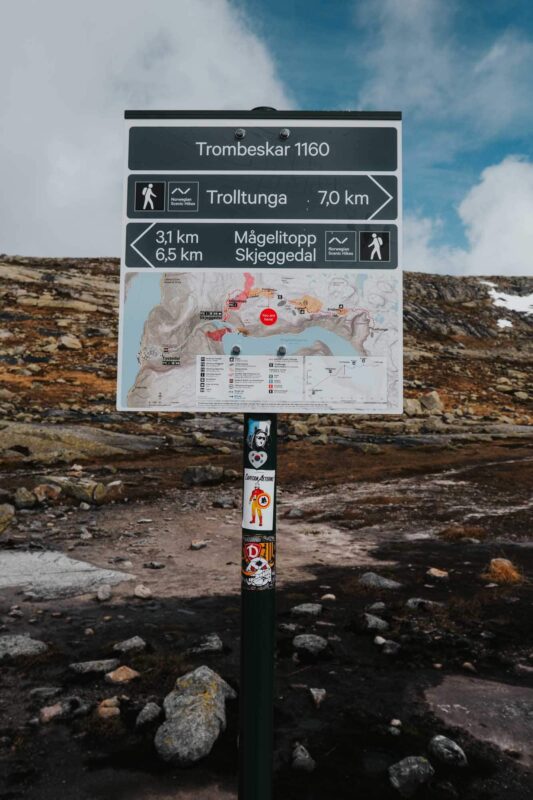
Good to Know: The entire route is clearly marked with a red ‘T,’ so you can hardly get lost. If you prefer to follow the route on your phone, you can see the trail in the Maps.me app. You will have reception and internet throughout the route.


Trolltunga Hike in Winter
In the winter months, from October to May, there is snow, and the trail becomes somewhat more challenging. It is only possible to undertake a day hike to Trolltunga with a professional guide during this time. Although the landscape might be less visible, the experience and view are very special, especially as there are fewer people around. Read more information about the Trolltunga hike in winter.


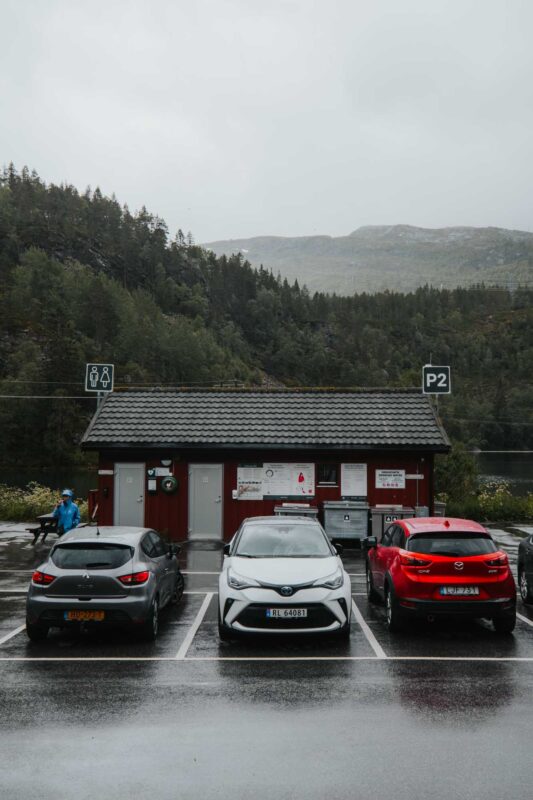
Different Parking Options
There are three paid parking areas at different locations, along with shuttle options between parking lots. These parking areas vary significantly in price and distance, which can greatly affect the length of your hike. Below, we outline the three options, but it’s wise to check the official website for current prices and regulations.
Tyssedal Trolltunga Carpark P1 – This is the farthest parking area from the start point. If you arrive in a camper, you must park here as the following road is too narrow for campers and vans. After parking, you can take a shuttle for the rest of the route. If you are driving a car, it is better to park at P2 or P3.
Skjeggedal Trolltunga Carpark P2 – This parking area is five kilometers (3.1 mi) closer to the start of the hike, and most people park their cars here. From here, you can either take a shuttle to the start of the Trolltunga hike or walk approximately one hour to the start. More details are provided in the next section.
Mågelitopp P3 – This parking area is next to the start of the hike. To reach it, you must drive up a steep winding road. There are only 30 parking spaces, and reservations are required. Note: You are allowed to drive to this parking area only during certain times, which you can check when booking your tickets.


Shuttle from P2 to the Start Point or Walking?
From P2, you have two options to get to the start of the hike: by shuttle or by walking. Be aware that this is a fairly strenuous 3.5 km (2.2 mi) climb with about 400 meters (1,313 ft) of elevation gain. The route is quite monotonous, taking around 1 to 1.5 hours. To save energy for the hike, it’s best to use the shuttle. From June 1 to September 29, a shuttle operates, provided there is no snow on the road. The ride takes only 10 minutes. Shuttle tickets must be reserved in advance. If you book an organized tour, the shuttle is usually included.
Tip: You can also choose to use the shuttle only on the way up, thus skipping the strenuous climb and only walking back down.
Bus from Odda to P2
Daily buses run from the nearby town of Odda to P2. There are two different bus companies: Odda Taxi and Odda Buss. You can book a one-way or return trip. If you want to be taken to the start point by shuttle, you will need to purchase a separate ticket (see the previous section).

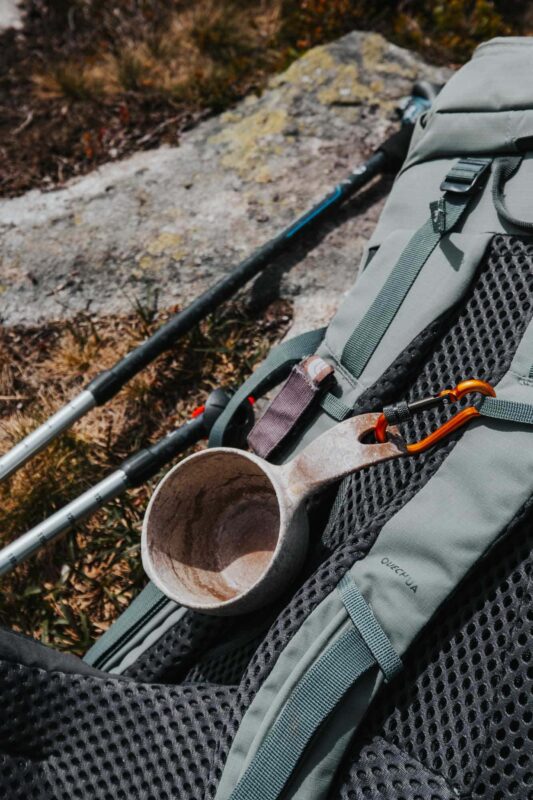
What to Pack for the Trolltunga Hike
The weather in the mountains changes daily, and forecasts are not always accurate. Additionally, weather conditions can change suddenly, so it’s best to be prepared for a range of conditions.
- Backpack of at least 30 liters with a hip belt
- Waterproof wind jacket
- Hiking pants
- Rain pants
- Down jacket
- Fleece vest or wool sweater
- Hiking boots
- Hat
- Waterproof gloves
- Wool socks
- Headlamp
- Sunglasses
- Sunscreen
- Thermal clothing (in winter months)
- Water bottle (minimum 1 liter, refillable along the way)
- Snacks


Extra Tips for the Trolltunga Hike
- Check the weather forecast the day before your hike. The website Yr.no provides accurate forecasts, but mountain weather can change unexpectedly. Even with a sunny forecast, bring rain gear and a fleece vest.
- There are no toilets on the route. The last toilets are found at P2, so use them before starting your hike. If you need to go during the hike, use the natural surroundings but stay away from streams and rivers to avoid contamination. Do not leave toilet paper in the wilderness; bring a bag to dispose of it properly after your hike.
- Avoid hiking in the dark by starting early.

The Ultimate Reward After the Trolltunga Hike: A Private Sauna by the Fjord
If you complete the Trolltunga hike in two days (and return on time on the second day), it’s wonderful to relax in a sauna afterward. We booked Heit Sauna for an hour and a half, which was the perfect reward. Heit Sauna is a small private sauna beautifully located by Sørfjorden. The cold fjord water is perfect for a refreshing dip after exiting the sauna. The sauna features large windows so you can enjoy the view even while inside. Heit Sauna is a half-hour drive from P2.
Tip: Use the discount code SAUNA to receive a 10% discount on your reservation.


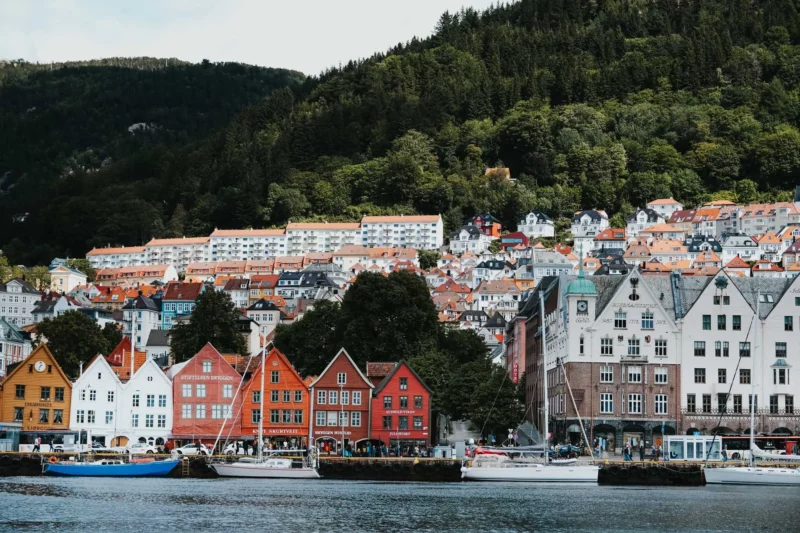
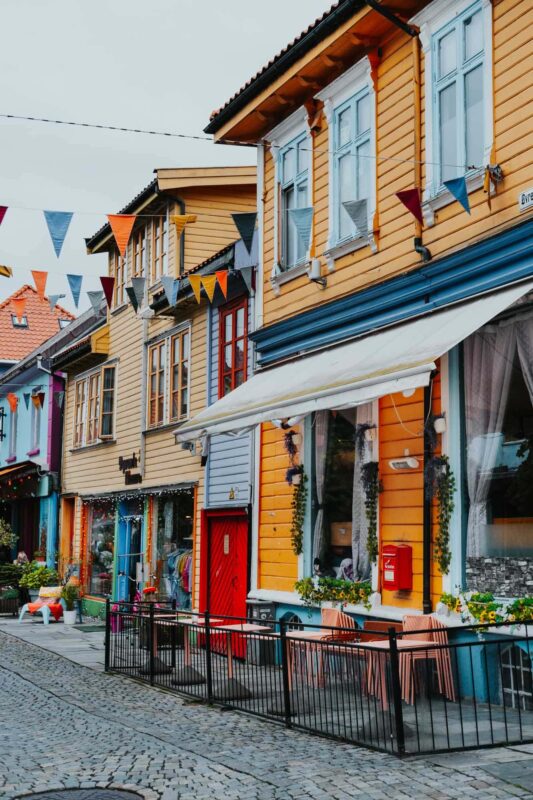
Base for Trolltunga: Odda
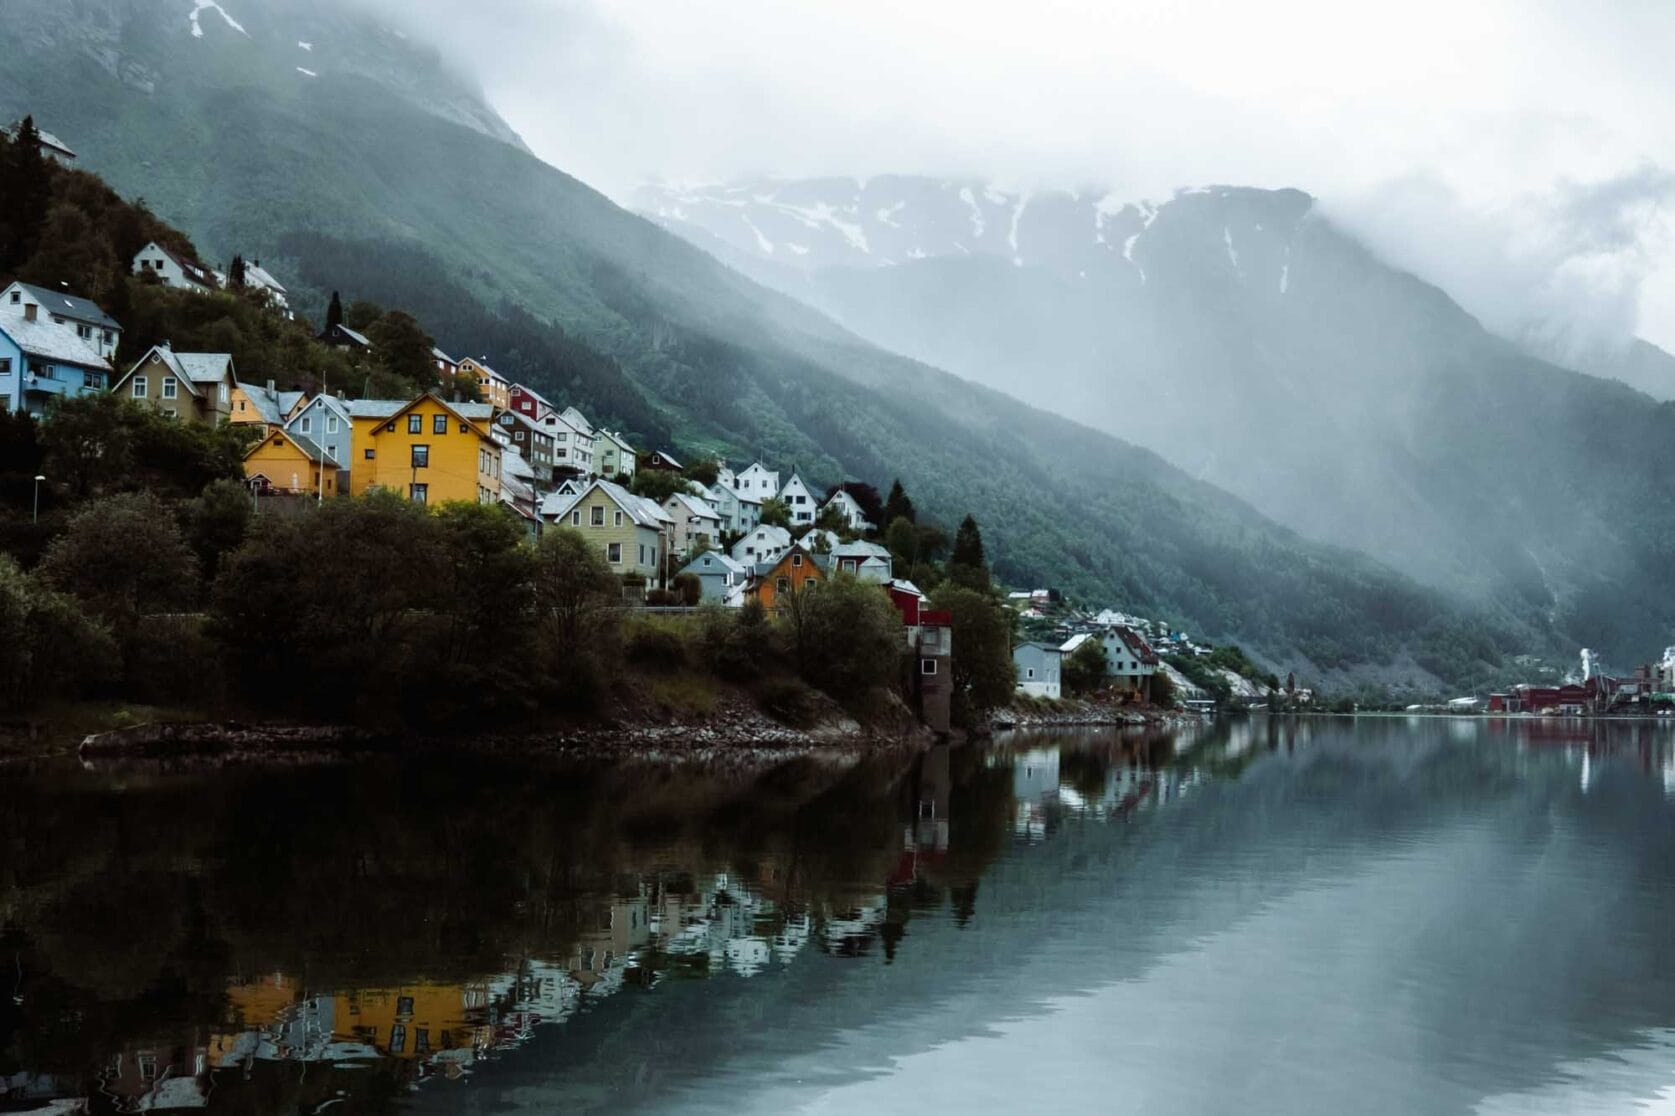
The charming town of Odda, located by Sørfjorden, is the ideal base for the Trolltunga hike. Odda features picturesque colored wooden houses perched on the mountainside, reflecting beautifully in the water on clear days. The town is surrounded by high mountains and glaciers. In Odda, you’ll find large supermarkets, gas stations, bakeries, accommodations, and restaurants, making it a convenient base for your Trolltunga hike and other nearby spots. Just 6 kilometers (3.7 mi) away, near the start of the Trolltunga hike, is the small town of Tyssedal. Here, you’ll also find a few accommodations, and its favorable location makes Tyssedal another good base.
Restaurant Tips in Odda: Trolltunga Lille Bakeri AS offers delicious sandwiches and coffee at a good price. Ferskvaren is one of the best restaurants in Odda for lunch and dinner with fresh local produce.
Great Places to Stay in Odda and Tyssedal
Accommodation options in Odda are limited, but Blue House Odda is one of the most affordable choices. Here, you stay in a comfortable apartment in the center of Odda, equipped with a good bed, kitchen, bathroom, and TV with streaming services. Another advantage is the free parking. In Tyssedal, the lovely Trolltunga Aparthotel offers spacious apartments with a balcony at a friendly price. The views from this hotel are fantastic! If you’re traveling with a tent, camper, or caravan, Trolltunga Camping in Odda is the nearest camping site to Trolltunga. This campsite is beautifully situated by a lake with a high waterfall in the distance. Even if you’re not camping, you can stay in one of the cabins at Trolltunga Camping.
 Blue House Odda Blue House Odda |
 Trolltunga Aparthotel Trolltunga Aparthotel |
 Trolltunga Camping Trolltunga Camping |